 |
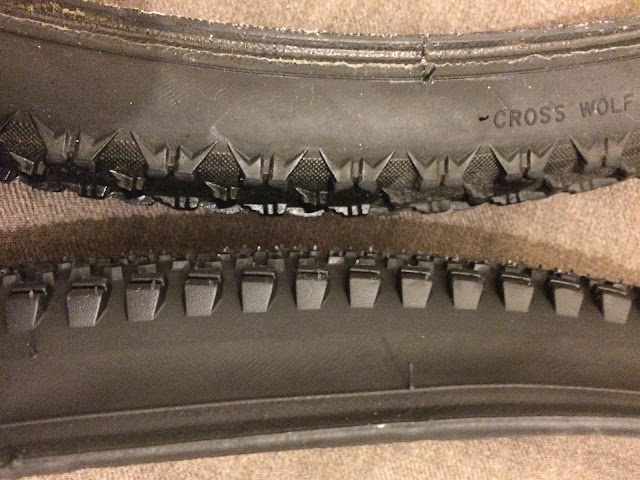
| Riddler 37c and Cross Wolf side to side |
Now the cyclocross season is over here in the UK, the spring/summer 'gravel grinder' season is looming.
The drier, harder ground makes skinny knobby cyclocross tyres perform quite badly. With little to no mud to shed, there's very little point in aggressive treads.
 |
| The WTB Cross Wolf is 32mm wide and leaves plenty of clearance around |
These tyres performed really well throughout the Wessex CX League season, from the early dry races in September, to the muddy December and January days.
I could race them tubeless at quite low pressure (20 psi at the front, 23 psi at the rear) on really muddy courses, and up to 30 psi on the faster dry courses. They are very narrow though, at 32mm wide, and don't like tarmac nor rubble. On tarmac their soft centre knobs tend to squirm a little when the tyre pressure is in the 30 psi range, and on rubble they are too narrow and will allow stones and rocks to hit the rim quite hard.
Having said all of that, they actually proved reliable during the Badlands CX Sportive, a demanding course for any CX tyre,
But that very sportive made me wish for something more gravel oriented. In particular, I was also looking for a tyre compatible with the conditions I am likely to find at the next gravel race in May, the Battle in the Bowl.
More volume and a less aggressive tread, that will fit within the clearance of my current bike.
 |
| The WTB Riddler 37c in its original packaging |
This is a tubeless tyre that is wide enough for summer cyclocross, with a fast micro knob centre tread, ideal for fast fire roads and pavement, yet equipped with aggressive side knobs to dig into the ground during the hard cornering of cyclocross. On top of that, at 37mm wide, they will fit most cyclocross frames, especially when mud is not on the cards.
 |
| The WTB Riddler 37c should fit most cyclocross frames and forks |
Side by side, the two tyres are quite obviously aimed at different conditions.
They are both tubeless, and they are a doddle to fit on the WTB Frequency rims, which is what you would expect when using components from the same maufacturer. More on this below.
The WTB Cross Wolf (with some dried-on WTB TCS sealant) weighs on average just under 400 grams. So we are talking about an extra 110 grams for the pair of WTB Riddler 37c. Worth it considering the advantages in terms of speed.
WTB TCS: Tubeless Compatible System
I have no qualms about WTB quality, the rims are strong and light, they have stayed true throughout the season, have survived some abuse, and have all the technological properties you would expect in a modern rim.
Most importantly though, these rims are tubeless: they have a UST compatible rim profile, which when using WTB TCS rim tape in the appropriate width (24mm wide for a 19mm internal width rim), achieves a burp-free seal, yet still allows tyres to be mounted by hand, without the need for levers.
WTB calls this tubeless tyre and rim combo TCS: tyre and rim made to work together, and I certainly stand by that claim.
 |
| The TCS system in full view: WTB Frequency i19 Team CX rims and WTB Riddler 37c tyre |
I have consistently run the WTB Cross Wolf tyres at 20 to 25psi (and sometimes 19psi at the front in a couple of races) and they never once burped.
You might be wondering how easy are these tyres to fit and inflate.
First of all, I always fit all tubeless tyres by hand, without levers.
I then inflate them without adding sealant, but by simply wetting the beads and rim walls using a water spray bottle.
Finally, I make sure the beads are not on top of the valve.
This normally takes a two or three minutes.
Now it's the time for the trick you were all waiting for: the inflation process.
Having experimented with different techniques in the past, I have now settled with the only one absolutely guaranteed to work. Airshot!
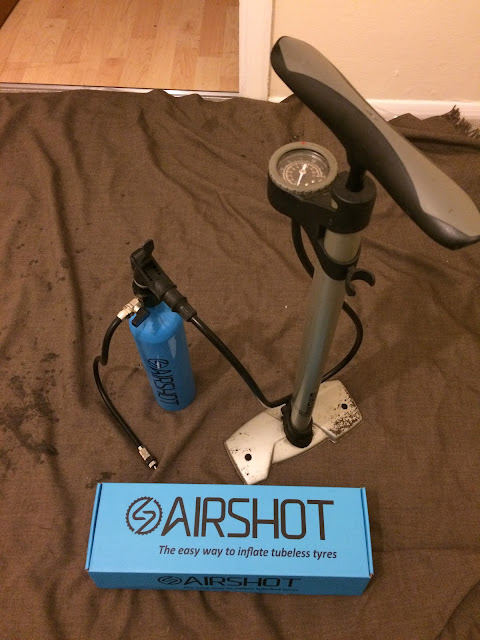 |
| Airshot ready for use |
It just works! First time, every time!
Simply inflate the Airshot bottle to 120 psi then open the valve: this will inflate a 700x37c tyre such as the WTB Riddler 37c to around 40 psi, and at the same time start to seat the beads well.
To fully seat the beads, I recommend proceeding by inflating the tyre to 60 psi.
Once the beads are fully seated, you can deflate the tyre and inject the sealant through the valve (removing the valve core first!) using a sealant injector.
Within 20 minutes, starting with a bare rim without tape, using TCS parts, you can have a fully seated, sealed, reliable tubeless wheel and tyre system.
P.S. Trick to set the tubeless rim tape
When I first install a tubeless rim tape, I certainly make sure it adheres well to the rim bed, covers the rim from wall to wall, and all air bubbles are pushed out, while really pulling on the tape in order to stretch it into place.
But the one trick I have learnt, is to fit a standard inner tube and the tyre of your choice, before injecting the sealant.
By inflating an inner tube to around 60 psi or more, the tape will adhere much more securely to the rim, and you will appreciate this when the time will come to replace a tyre or refresh the sealant, since the rim tape will not peel off the rim when using a lever to remove the tyre.


